
What you will need :
- White fondant to make you bunny’s bottom. Pink for the foot pads. Green for the grass and orange for the carrots.
- Circle cutters of two various sizes for cutting circle and guide for the mud placement (crushed Oreo biscuits or other)
- Oreos or other biscuit crumbs
- PME quilting tool
You
can get one of these tools here:
- Nylon craft brush
- Rolling pin
Getting started...
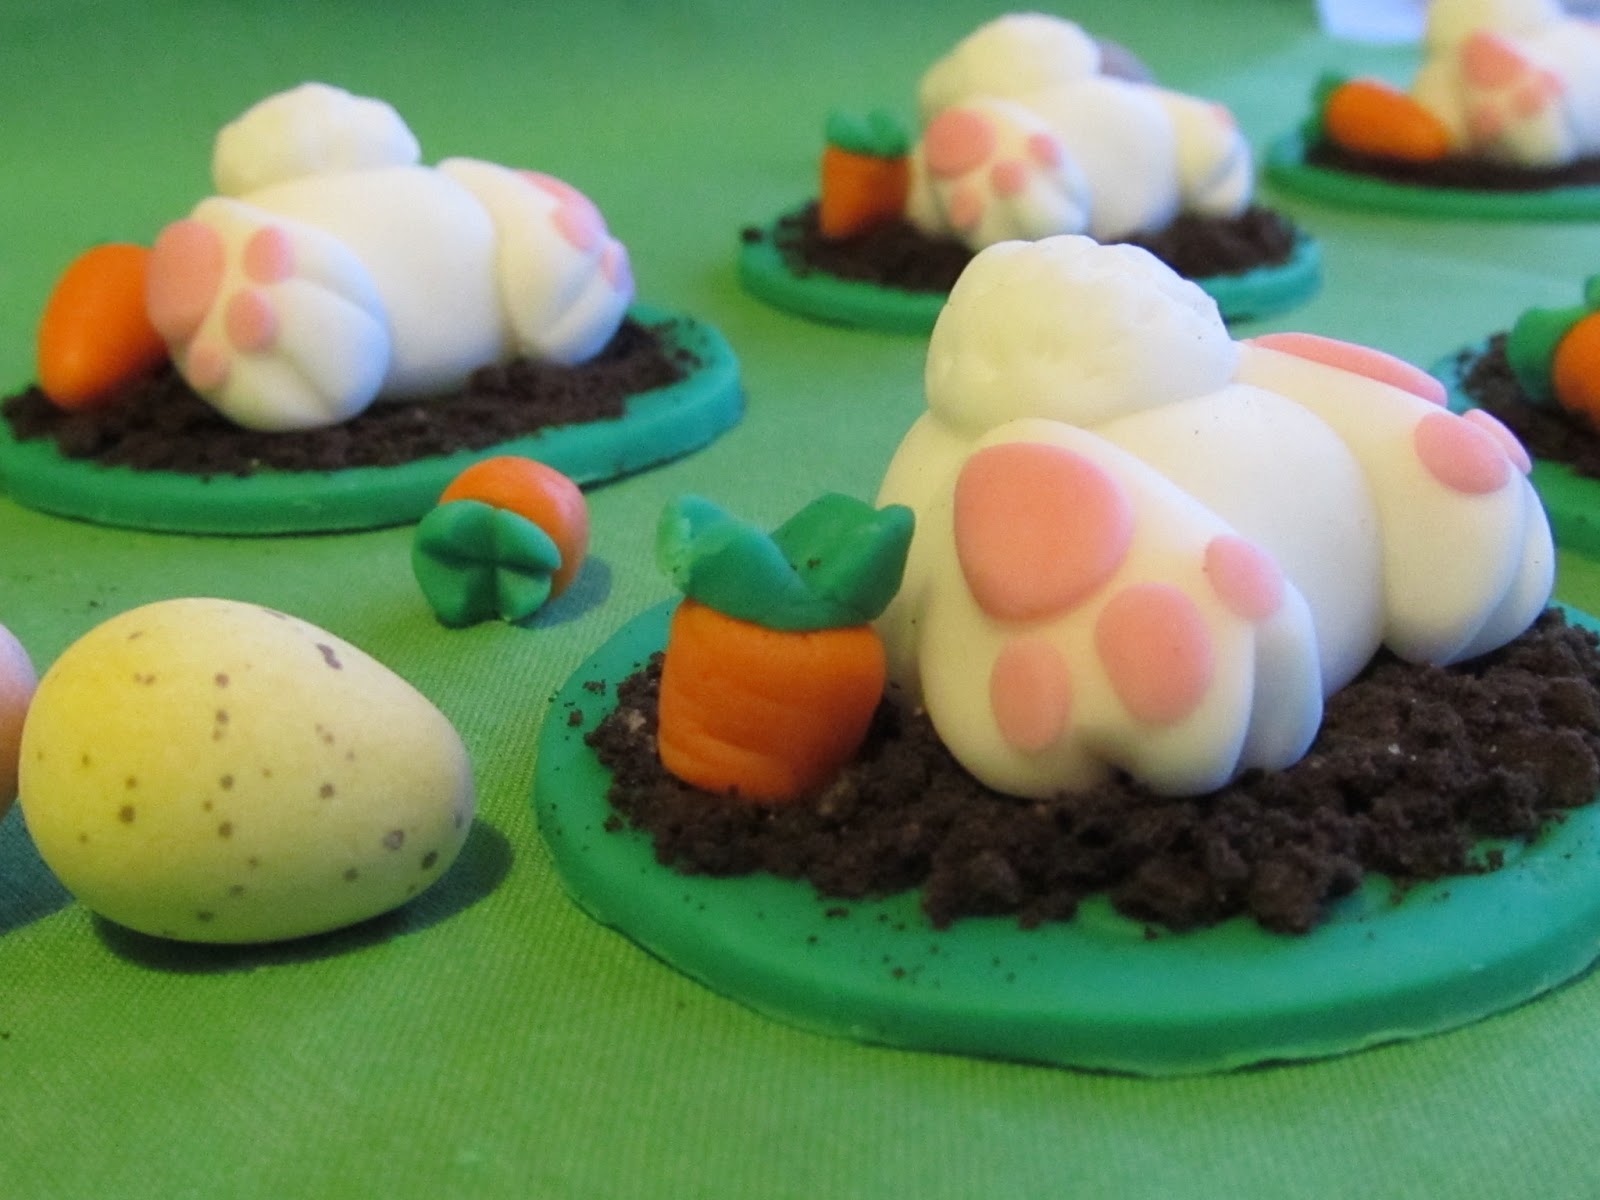
1. One small ball of white fondant (approx quarter the
size of a golf ball) and a ball of pink fondant quarter the size of the white
ball (keep your fondant covered when not in use as it with dry quickly)

2. Split the white ball into -body, tail and feet. Split the pink into equal pads (two heels, six toes/see pic for details)


3. Place the two feet on either side of the body
(use either edible modelling glue or watered down golden syrup to fix in place)

4. Apply
the tail in the same way and use the quilting tool to add texture.


5. Use the quilting tool to craft in the toes and
then place the heel and toe pads in the same way as you did the feet (with
edible modelling glue)


1. For the grass you will need the green fondant, two sizes of circle cutters and the rolling pin.

2. Roll out and cut a circle of green fondant with the larger cutter.

3. Use the smaller one to mark you mud position being
careful not to cut through!

4. Brush your glue around the inner ring and then
sprinkle around the Oreo crumbs. Put a generous amount of modelling glue/golden
syrup in the center.

5. Place your bunny bottom in the center - leave to
dry.

6. Roll out a carrot shape in the palm of your
hand and use the quilting tool to add carrot like groves and texture.

7. With a small amount of green fondant roll a ball
and using the glue fix into the indentation on the top of the carrot.

8. Use the quilting tool tip to cut into the green
sprout of the carrot one way and then the other.


9. Place some more glue on the end and along the side of the carrot and fix in place beside the bunny.

And he’s finished! I
hope you have enjoyed this tutorial and if there is anything you’re not sure about
you can either send an email or post your query below.
Thank you. I look forward to sharing more tutorials with you -Hx
Thank you. I look forward to sharing more tutorials with you -Hx
No comments:
Post a Comment